Better Choices, Better Results

Archive for September, 2011

Spots

I have fallen off the Physical Activity wagon AGAIN! 

I keep repeating the same old cycle: I’ll walk for days and sometimes weeks regularly; then something happens that causes me to stop that activity for awhile; then I feel bad about stopping it, so I do other things to keep busy, which gives me an “excuse” to not start back; then I realize that I’m allowing old habits to control me again, which is when I decide to do something about it – AGAIN.

I am a leopard who’s trying to change her spots!

Anyway, something great happened this week on the physical activity front.

Wait for it……

Woo Hoo!

Look what I now have access to!  A treadmill!

 And this, too!


I’m so excited that I have some equipment to work out on when the weather isn’t cooperating.   I have absolutely no excuse to not get in regular physical activity now.

Come on spots…CHANGE!

Making Preparations…

My days have been filled with work and my nights and weekends have been filled with some kind of canning and preserving activity for weeks and weeks.  With Fall’s arrival, I’ll get to slow down a bit, at least when it comes to canning.

Oh, heck!  What am I saying!  We all know that if I find something intriguing to can, I’m going to try it!

Anyway, my focus is now on my upcoming Cooking Demo.  If you are new to this blog, I do a quarterly Cooking Demo for our weight loss surgery patients.  On November 1st I’ll be showing our patients the wonders of dehydrating!  I’ve been scouring internet chatrooms and asking for ideas from my favorite blog, Chickens in the Road.  The people from there have the most amazing ideas and I can’t wait to experiement.

Do any of you have experience with dehydrating?  I’d love to hear about it!

Keep Busy – It Works for Me

I have noticed that I tend to want to snack when I’m really not involved with any particular task.  It’s that whole “I’m bored and watching TV and want to nibble” syndrome.  This probably isn’t a huge surprise to anyone. 

I decided to test my theory recently by alternating a few busy days with a few slow days.  On my busy days, I’d keep really active; on slow days, I took advantage of naps and getting caught up on all my DVR’d TV shows.

Let’s take last weekend.  On Saturday, I started my morning by eating breakfast, and then I got right to work on laundry.  Once the first load was in the washer, I got to work on making some apple juice/applesauce.   Getting the apples prepared requires concentration (I was using a sharp knife, after all!), so my mind really could not wonder while I was engaged in that process.

After I got the first batch of apples in the steam juicer, the first load of laundry was ready to go into the dryer, so I made that switch and put another load into wash.

I checked on the process of the apples, and then started processing all the veggies for my Salad Drawer.  I had lettuce to cut and wash, carrots to peel and chop, mandarin oranges to drain and portion, raisins, dried cherries and dressings to measure, and All Bran to divvy into small bags.

After that was done, I checked my apples.  It was time to put more apples in to the juicer, so I had to prepare another batch.  After I’d completed this task, the laundry was ready to be hung up or folded, switched from the washer to the dryer, and another load was ready for the washer.

Whew!  This was all accomplished by lunch-time.  I ate, turned off the steam juicer because all the juice had released from the apples, and took a shower.

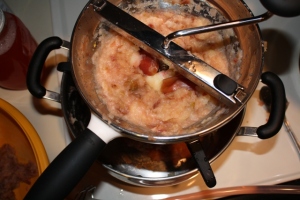
Afterward, I put my apple juice into jars and got them into the water bath canner.  I then started putting the apple pulp through my Foley food mill to make apple sauce.  By the time I’d gotten all the applesauce made, the apple juice was ready to come out of the canner and then I needed to get the applesauce into jars for canning. 

It was time to do the laundry switch-a-roo again, and when that was completed, I got the applesauce out of the canner, expressed my frustration at having a couple of jars overflow, and then I sat down for a few minutes.  (And, if the truth is to be known, I took a 40-minute nap.)

Then I went shopping for the ingredients I needed to make jerky.  While at the grocery, I picked up some chicken breasts to can, so when I got home, I started right in on cooking those in preparation for canning.  After those were finished, I turned them off to cool a bit and ate supper.

By this time I was getting tired, but I couldn’t stop, because I still had chicken to can!  I got the chicken into jars, and then into the pressure canner for their 90-minute journey to a shelf-stable life.  While they were cooking, I admit that I rested some.  I’d gone non-stop all day!

When the chicken came out of the canner, I decided to call it quits for the day. 

What I noticed when reviewing my food journal for the day that I only ate when I got hungry, because otherwise, my mind was engaged in whatever I was involved with at the moment! 

I only ate when I got physical symptoms of hunger.

Sunday wasn’t nearly as busy.  I slept a bit later and watched more TV, and didn’t have a list of projects that had to be completed before the day was over.  Generally speaking, it was an easy day.  I also noticed that I wanted to snack more. 

Even though Saturday centered on food and its preparation/preservation, I wasn’t bothered by the desire to think about what I was going to eat next.  I can’t say the same for Sunday.  I cooked and made soup and put the jerky in to dehydrate, but I was definitely more preoccupied with my next meal.  I certainly ate more that day than I did on Saturday.

What am I saying here?  That you should keep busy all the time to keep from eating?  Well, yes and no.  If you are like me and struggle on some days with wanting to graze all day long, I am suggesting that you find something to do that will get your mind off of eating. 

Do whatever works with your lifestyle.  Keep a list of projects handy.  If you find yourself struggling, tackle a project and see if your mind changes its focus.  It seems to work for me.

Good luck, and let me know what keeps you from eating when you aren’t hungry!

Applesauce – The Real Deal

A few weeks ago, I was given a steam juicer.  I had wanted one for over a year, so when my friend gave it to me, I was thrilled beyond belief! 

What’s a Steam Juicer?  I’m sure you must be asking yourself this question right about now. 

A steam juicer is a stove-top juice extractor that is wonderful for making apple, grape, strawberry, peach, pear, etc., juice.  It can also be used to cook meat.  The bonus of using a steam juicer is not only do you get the juice; you also get the left-over pulp to use, as is the case with my applesauce. 

Let me explain.  The juicer has three separate compartments and a lid.  The bottom reservoir holds water, that when heated to boiling creates and sends steam up through the middle section so it can reach the top section, which houses the fruit.  The top section is a large colander that will hold quite a bit of apples or grapes, or whatever it is that you are juicing.

When the steam reaches the fruit, it starts to break down the cells of the fruit, which releases the juice.  The juice drips into the middle section, which has a tube coming from it.  The tube empties into another pot.  Once that pot is full of juice, I clamp off the tube, empty the pot into another container, and unclamp the tube.

Rinse and repeat until all the juice has been released from your fruit.

When I got my juicer, I immediately went to the orchard and bought a box of 2nds.  Seconds are the apples that aren’t pretty enough to sell in the showroom.  They are usually misshapen, bruised or wormy.  That wasn’t a problem for me.  I simply washed and cut away the bad parts, dumped them into my steam juicer and let it do its magic.

When I’d extracted all the juice, I had quite a bit of apple pulp to deal with.  This is where you get bonus prizes from using a steam juicer.  I ran that apple pulp through my Foley food mill, and had apple sauce.  It was very good on its own, but I did sweeten it with a bit of Splenda to make it even sweeter.

I used Ruby John apples in my first steam juicing experiment.  The bushel of 2nds cost me $10.  From the $10 investment plus my time, I got over 2 gallons of pretty pink apple juice (pink because the apple skins were very red) and about 2 gallons of pretty pink apple sauce.  I didn’t stop there.  From the apple juice, I made 18 half-pints of apple jelly and canned 12 half-pints of juice to drink.  (We don’t drink a lot of fruit juice because of the calories, but I use it in cooking sometimes.)  I had a little bit of juice left over and I mixed it back into the apple sauce.

From the applesauce, I canned 12 pints of lightly sweetened applesauce and made 12 half-pints of Pumple Butter.

Pumple Butter? 

BONUS RECIPE!!!!

I took 3 quarts of applesauce and put it into my crock pot.  Then I added about 1 quart of pumpkin puree that I had frozen last year.  I then added cinnamon, allspice, pumpkin pie spice and a bag of Splenda Brown Sugar.  I let it cook in the Crockpot on low all night.

Oh…..my….goodness!  Pumple Butter is heavenly!  I gave away 9 half-pints and kept the rest for myself. 

I’ve been told that Pumple Butter would make a great Christmas present…

I invested $10.

In the grocery store, I would have to pay the following to buy what I made myself:

12  ½ -pints of apple juice:  $3.72

18  ½-pints of apple jelly:  $17.98 (at .96 per ½ pint)

12  pints of applesauce: $11.88 (at $1.98 per quart)

12  ½-pints  (3 quarts) Pumple Butter:  Stores don’t carry pumple butter, so I’ll use apple butter for my figures:  $6.54

Total:  $40.12  

I saved $30.12 by making the items myself.  Plus, I know where the apples came from and I know what is in everything I made.  Yes, it took quite a bit of my time, but I think it was time well-invested.

Note:  If you are steam-juicing something like peaches, pears, or even apples, you can puree your left-over pulp and put in into a dehydrator to make your own fruit leather.  Imagine!  Homemade Fruit Roll-Ups!

 Steam Juicing Meat

I haven’t done this yet, but I’ve been told that I can throw meat into the steam juicer and extract the broth, which I can then can for use in soups and gravies.  I’ll be left with meat that can be shredded for uses in casseroles or barbeque sandwiches, etc.  I’ll let you know when I try it!

I Made Jerky!

I bought a new dehydrator back in January, and I’ve wanted to try making jerky for some time, but I’ve been afraid to try it for some reason.  I came up with passable excuses:

  • I don’t have time.
  • We don’t have the beef right now.
  • I can’t slice meat that thinly.
  • I’m using the dehydrator for veggies right now.

Well, this weekend I did have time.  We had the beef – we bought it thinly sliced for this purpose.  And, I had just completed drying some green beans and had nothing new to put on the dehydrator, so it seemed like the perfect time.

Spoiler Alert!  If you are coming to my cooking demo on November 1st, you’ll be seeing a demo of me making jerky, among other things.

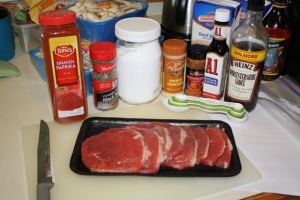
I found a recipe on the internet (I just love the internet!) that my dad thought he would like.  I gathered my ingredients:  (Ignore the mushrooms, cooking sherry and beef stock – that was used in a Golden Mushroom Soup that I canned for future use!)

Paprika, Pepper, Salt, Onion Powder, Cayenne Pepper, A1 Sauce, Worchestershire Sauce and Beef

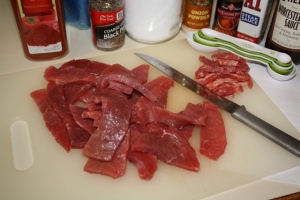
 Then I trimmed all the fat and connective tissue that I could:


Trimmed and cut into smaller pieces.

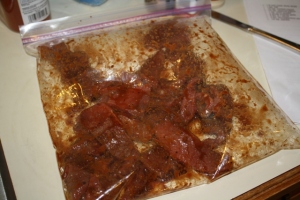
Then I marinated the beef in the seasonings for about 3 hours.


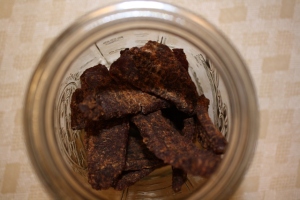
Onto the dehydrator tray it went.  I cranked the temperature up to 160 degrees and walked away.


After about 6 hours, I went to check it and found that it had become jerky!


I tasted it, and put it in a jar (imagine that!).  It’s ready to eat.  I can’t wait to try other recipes!  Now that I know how to do this, I’ll be making jerky often and using my new FoodSaver to seal it in bags for long-term storage.


Have you ever made jerky?

Welcome to My Salad Drawer

Yum! An entire drawer devoted to my salads!

I created this over the weekend to assist me in my ongoing weight-loss journey.   It’s no ordinary crisper drawer, and there are no moldy, fuzzy, wimpy and limpy veggies in here.  In fact, because I’ve vacuum sealed the lettuce in those jars, I can fill up this drawer with enough salad fixin’s to last an entire week and not have to worry!

I got this idea when doing some canning research at home one night.  I was looking for “meals in jars.”  I was actually looking for recipes like beef stew and chicken soup that could be pre-canned and ready to eat.  How convenient to just grab a jar off the shelf and have a ready-made lunch that didn’t require refrigeration?

Well, I happened upon a site called Salad in a Jar and was immediately intrigued.  The author’s main point on her site is that you can eat a big salad for lunch every day and not feel guilty about having a dessert also.  Well, my goals are different, but I like the main thought of having a salad for lunch most days.

Here’s how you, too, can create a Salad Drawer.

Clean out a crisper drawer.  You probably have veggies in there, anyway.  Just go ahead and get them ready to be cut up for salads.

Cut up your lettuce.  I used iceberg and Romaine, but I suppose you could use any kind you wanted.  Note: the author of Salad in a Jar indicated that the more delicate lettuces don’t hold up as long.

Just cut it all up in a big bowl and fill your jars.

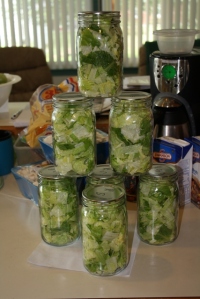
Fill your jars with lettuce.  I pack might pretty tightly.

Vacuum sealing is the key!

Then, you need to vacuum seal them.  Just storing the lettuce in a jar won’t prevent browning and wilting.  They must be vacuum sealed.  I bought a FoodSaver with a jar attachment just for this purpose.  (You know I love buying kitchen gadgets!  I will use this for other things as well.)

Enough for every day this week - I might even share....

Do enough for an entire week, if you want.  The lettuce doesn’t start to show age for at least 7 days, if it was fresh to begin with.

Decide on what you want to use for your salads.  As you know from my posts about being a Salad Artist, I like to get creative and use different meats, cheese, beans, dressings, nuts, etc., on my salads.

Put everything in pre-portioned containers so that you know exactly what you are eating.  Portion control matters!  A serving of salad dressing is usually 2 tablespoons, not ½ cup.  Nuts and other topping are usually by the tablespoon, too.  Don’t take a chance on making your healthy lunch unhealthy by not paying close attention to portions and just piling on the toppings.  Trust me – once you get used to lesser portions, you won’t miss all that extra fat and calories.

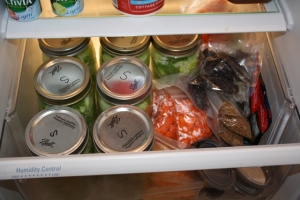
Put it all in the drawer and mix & match each day.

A look inside shows how I've pre-protioned everything.

This week I have lettuce, carrots, mandarin oranges, tuna, All Bran (for crunch), raisins, dried cherries and pre-portioned dressings.  Next week, I’ll probably put beans, cheese, chicken and nuts in there.

Be creative!  Be healthy!  Eat Salad!


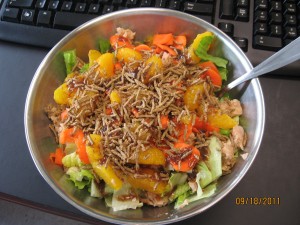
The Masterpiece


Update:  I made my salad and it was so pretty that I had to take a picture.  Someone then asked me to compare the cost of what I brought to a typical fast food meal.  After some quick math, I determined that today’s salad cost me $3.71.  An average meal at McDonalds is over $5.00.  So, if any of you have people who argue that they can’t eat healthfully on a budget, please share my post with them.

Goodbye…For Now

I was going to give a quick synopsis of the 2011 garden today.  I “closed shop” last Saturday when I went out there and pulled up the second growing of green beans, loaded up the water hoses and untangled the tomato cages.

However, when I started looking at all the photos I took this spring/summer, I started to get emotional because this garden meant so much to me.  In doing it, I got to spend time with some people I love.  I got to learn more about gardening, which only proved to me that I know even less than I thought!  I had the fun of harvesting the firsts – the first pepper, the first zucchini, the first beans, the first potatoes, the first (and only, as it turned out) corn.

I had the misery of working in heat over 100 degrees, fighting bugs, sweating, wearing painful blisters on my hands, getting a terrible sunburn, fighting with (and losing to) weeds, and dealing with corn-snatching critters.

I harvested lots of food to feed my family!  I know that because of my work, we’ll have green beans, potatoes, sweet potatoes, onions, corn, dried cranberry beans, zucchini bread and canned peppers to last until next harvest.

I got to enjoy the most beautiful sunflowers I’ve ever seen!

I figured out how to turn my little car into a farm wagon!

I got my first pair of rubber work boots – in pink!  (Thanks, Lisa!)

Enjoy this little stroll down memory lane.  I’m looking forward to starting up again next April.

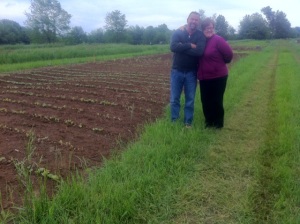
Mickey and I right after our plants started blooming.


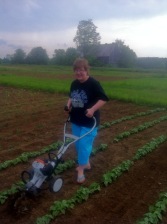
Using Mickey's cool little tiller to help keep the weeds down.


We fought hard against bugs all summer!


The day I got my pink boots. I love them and have worn them a lot!


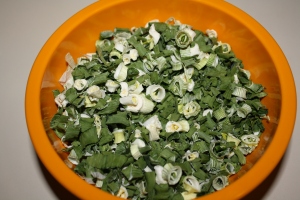
Our green onions did very vell - I dried a bunch of them to use throughout the year.


We were/ARE so very proud of what we accomplished!All together, I canned 130 quarts of beans, dehydrated 16 quarts and had plenty left over to eat fresh as often as we wanted.


Cranberry beans were new to me. They are like pinto beans - dried on the vines, then picked and shelled. The spots on these are pink, rather than brown. They are delish!


We had 8 rows of potatoes. I've canned whole potatoes, made hash browns and plan to dehydrate even more.


Just one of the many painful blisters I had this summer!


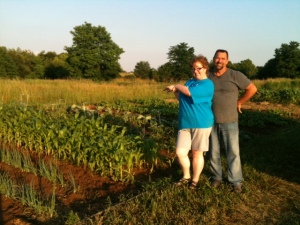
Mickey competing with the first sunflower blossom. I think they both look great!


Jalapenos!


I harvested 24 ears of corn. After that, the critters (deer? raccoons? I think they were working together!) completely destroyed all 6 rows of corn!


We ended up with about 40 pounds of sweet potatoes.


Just a couple of the incredibly beautiful sunflowers I grew...


So sad and lonely after working hard all summer....

 April, 2012….I’ll be back!

Baking Soda Shampoo

I mentioned in a previous post that I’d stopped using regular shampoo in favor of a baking soda and water mixture.   Someone commented they would like a little more explanation on that, so here it is.  This is my story of how I gave up the expense and chemicals of regular shampoo.

 If you’ve been reading this blog for any length of time, you know that I’m in favor of the more natural, sustainable things in life.  My baking soda “shampoo” is a change that I’ve made in that direction.

I first read about this on my favorite blog, Chickens in the Road.  Then I did a little more research and found this blog, which supported what I’d read over at Chickens.

I was ready to try this out.  I mixed up my solution of one tablespoon baking soda with 8 oz. of regular tap water.  I did this at night so it would be ready to use the next morning.

What I found interesting was that after sitting overnight, the baking soda dissolved completely.  It looked like I was using regular water.

I squirted a little of the mixture on my wet hair – brrr!  It was cold!  After that initial shock, I gently worked the “shampoo” through my short hair.  It didn’t take much, maybe a tablespoon or 2, and I could feel the grime releasing from my hair as I washed.  I rinsed and was done.

I could tell no difference at all in how my hair performed with this as compared to store-bought shampoo.  You may be different.  I’ve read that some people do have a week or two of adjustment, so be patient if you choose to try this.  I think that one reason I adjusted so easily is that I don’t use any commercially-produced hair products, like gel or mousse or even hair-spray.  I’ve just never liked the feel of them and they always made my scalp itch, so I just didn’t think it was worth the bother.

I’ve also noticed that if my hair is really dirty – like if I’ve been working in the garden – I can feel a very slight lather with the baking soda.


My hair the day after rinsing with baking soda and water. You can see that it's not greasy or oily, and my waves and curls are as natural as can be.


OK – so now you know my clean little secret – I don’t use shampoo!

Backsliding

The past couple of weeks have been difficult for me.  I’ve struggled to keep from eating too much and from eating the wrong things.

While I was in West Virginia at the retreat, I didn’t have a lot of choice in what I ate; I had to eat what was provided to me.  Let me say that the food was really quite good.  As I mentioned in an earlier post, the people in the bread-making classes provided bread; loaves, rolls, pepperoni rolls, cinnamon rolls and cocoa rolls and Fruit and Cheese Danish for us to eat while we were there.  They were good, but they weren’t exactly healthy.  I’m grateful to know how to make them, and I’ll be making some to share with my family and co-workers, but for myself, I really prefer whole grain breads.

Breakfast each day was a bread of some sort.  Again – very good, but I needed protein!  Without it, I knew I’d be famished within an hour.  The first morning my new friends and I went in search of a protein option for breakfast.  After, of course, making the obligatory appearance in the dining room and sampling whatever was served to us for breakfast.    

If you’ll recall, we were in the mountains of West Virginia, so it was about a 20-minute drive to find a restaurant.  The place we found was Tudor’s Biscuit World.  They serve biscuits that are 4” across.  (I’m not exaggerating.)

Can you see where I’m starting to go astray with my eating?

I was so smart the first morning.  I ordered the low-carb meal; eggs and bacon.  The next morning, I couldn’t pass up those biscuits!  I just had to have one.  I just HAD to have another one on my third morning as well.

The rest of the meals served weren’t that bad, as far as healthy options.  My problem was that since I had packed no snacks (healthy or otherwise); I ate large portions at mealtime for fear that I’d get hungry before the next meal was served.  Next year, I will pack fruit and yogurt and protein bars to take with me!

After returning, I found it difficult to get back on track with my eating for a couple days.  I did, however, manage to get back into my regular routine.

Then we had a big family party!  With cake and punch and sweet foods and fattening side dishes!  Augh!

The Good News:  I am eating my regular healthy foods again.

The Bad News: I gained weight while I was off my plan.

So now I have to pay the price for indulging. 

What have I learned?  Better planning could have helped me to avoid this. 

I’m not going to beat myself up, because every experience helps us learn something.  I just know how to handle the next situation a bit better.

Finding My Tribe, Part 2

While traveling (OK, getting lost) on the back roads (a.k.a goat trails) of West Virginia on my way to the Chickens in the Road Retreat, I ran into two other women who were as lost as I was.  Deb and Betsy were stopped in the middle of the road, talking to two local women, trying to find out if they could help us figure out how to find Camp Sheppard.

Betsy took down directions and we were off again.  We drove, and drove; avoided drop-offs and pot-holes; took photos of the scenery and didn’t stop to check our directions with the scary-looking men wielding chainsaws at the side of the road (true story).

We stopped after a while to try to figure out where we were, and this sweet older couple stopped to ask us if we needed help.  We told them where we were going, and they offered to lead us to the road we were looking for!  (God bless those kind people!)

After a few more minutes of driving, we came upon a better-maintained road…a road with yellow lines painted down the center!  CIVILIZATION!!!  I have never been so happy to see a double-yellow line in my life!  A couple more minutes took us to the road we wanted, and the camp was another 1.5 miles away.


I was so happy to see this sign that I did a little dance right in my car!

We made it!  With 2 minutes to spare before the first class started. 

We hustled to get our stuff into our cabin and get to the first class, which for me was Soap Making: Bar Soap.


Our Cabin - the only one with Air Conditioning. We were so happy to have been assigned this one!

I walked in and I could feel that I was surrounded by people who, like me, treasure the natural, the homemade, the simple things in life.  I knew immediately that I could make lasting friendships and learn from the people around me. 

They didn’t question why I’d rather make my laundry detergent than buy it.  No one looked at me strangely when I said I’d read about and started washing my hair with a baking soda/water mixture instead of store-bought shampoo.  I actually had company who was as excited as I was when my bar soap made lather!

Not feeling like an outsider?  Priceless.

I had found my tribe.